Hello buddies..
From the concept SHARING IS CARING, I am going to share with you how to hack your GT-N7000 system apks, so everyone can use this thread as a reference for how to mod their apks.
You have to keep in mind that there are different modding hacks that until this time I couldn't figure out how it is done. So please let me know if you have any modding that I didn't mentioned :D..
So let's start..!!
Needed tools:
1) APK-Multi tool. You can use my repacked one (Nov 2012) from here.
2) Backsmali/Smali program from here
3) Notepad++ program from here
4) WinRAR or 7-zip archiver
5) Willing of learning and some patience and cold nerves!!
Airview enabling
1. Just add this file to /system/etc/permissions in your phone.
2. Fix permission to rw-r--r-- and reboot
CRT TV effect
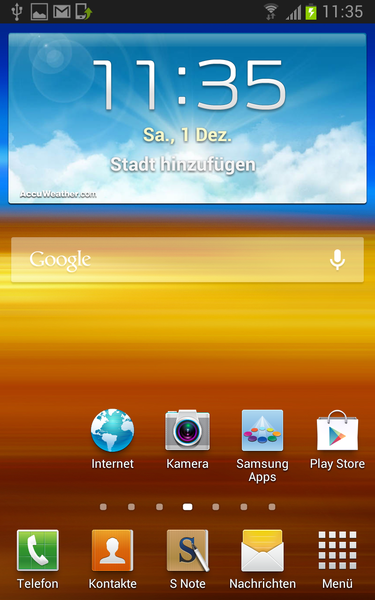
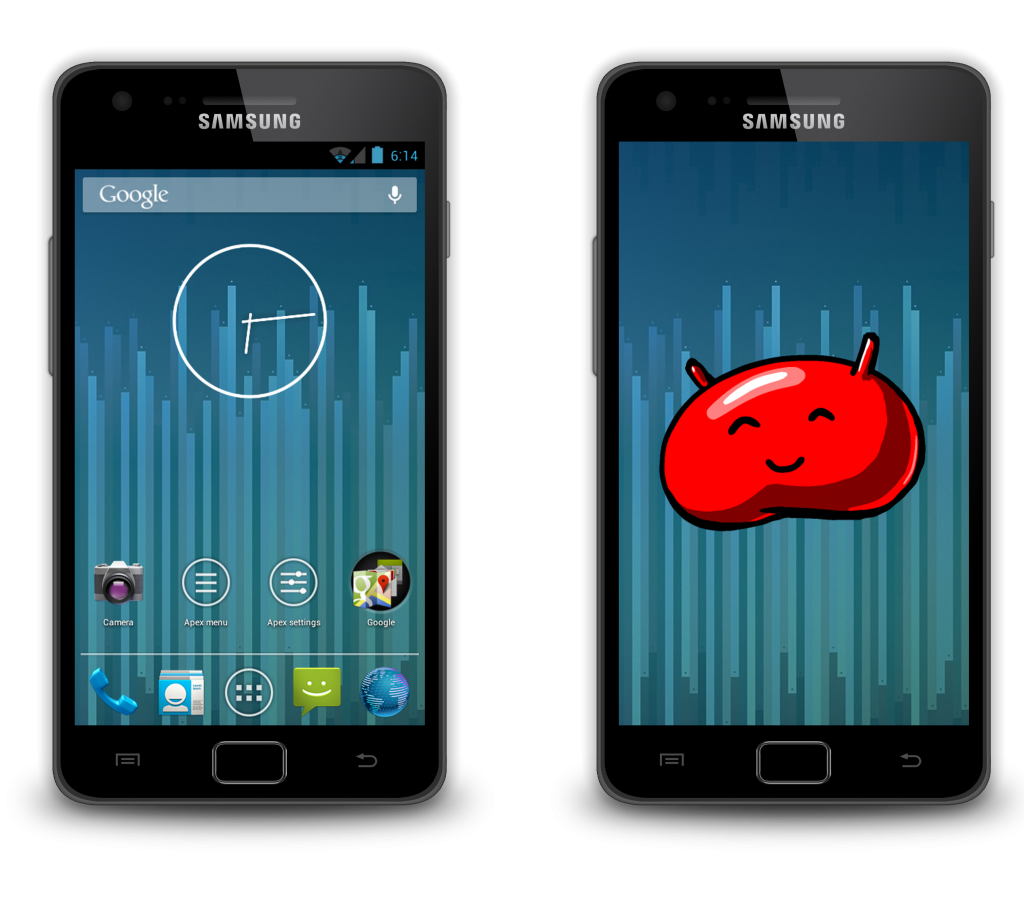
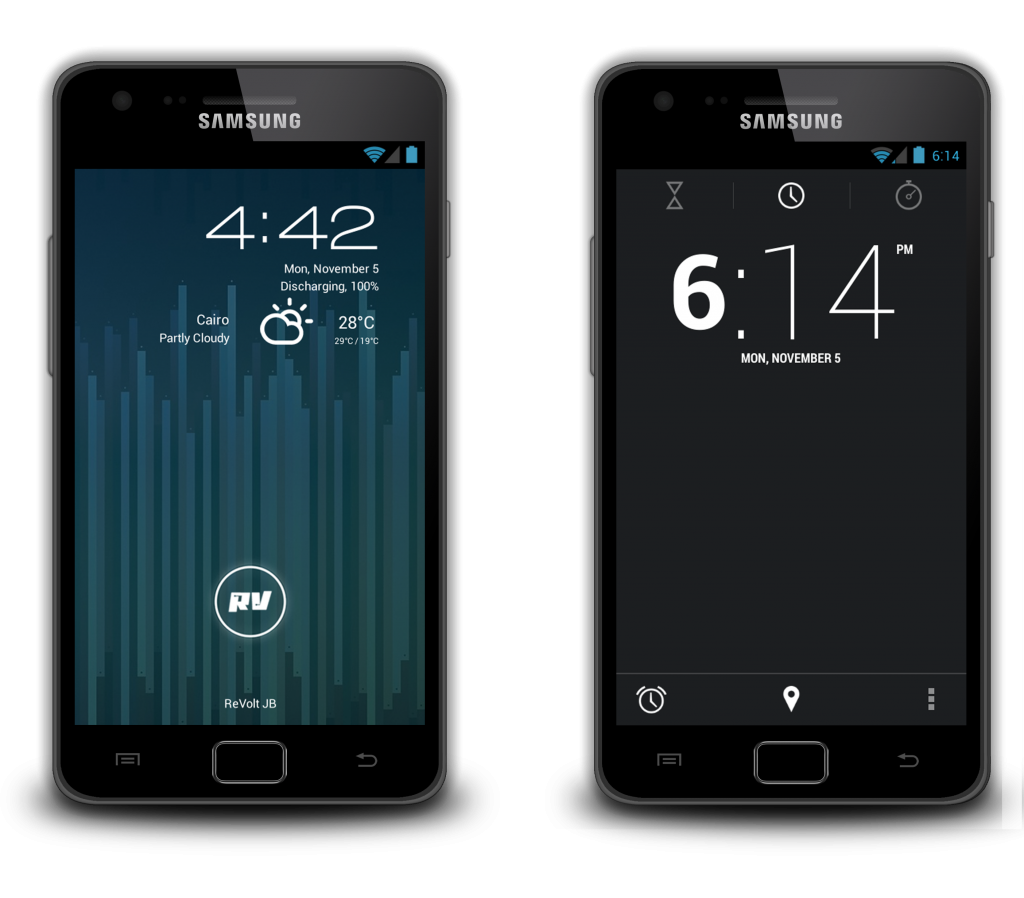
Change default home screen wallpaper and default lock screen wallpaper
1. Decompile framework-res.apk using APK-Multi tool
2. Go to \res\drawable-xhdpi folder and change the following pics to what you want:
4. Compile framework-res.apk and push it to your phone.
Here are some pics taken from SGN2: download
4-way Reboot Menu
1. We will need Backsmali/Smali program for this.
2. Download the following resources files (GlobalActions$99$1.smali, GlobalActions$99$2.smali, GlobalActions$99.smali)
3. Put the android.policy.jar in baksmali folder.
4. Follow its procedure to baksmali android.policy.jar, if done you will have classout folder.
5. Open classout folder and go to \com\android\internal\policy\impl and paste the three resource files; (GlobalActions$99$1.smali, GlobalActions$99$2.smali and GlobalActions$99) there.
6. With notepad++ open the GlobalActions.smali. (Note: Don't confuse it with GlobalAction$Action.smali)
7. In GlobalActions.smali, change GlobalActions$5 to GlobalActions$99 on both lines, and save it.
>>The Code should look like this:<<
8. Now Open GlobalActions$SinglePressAction.smali with Notepad++. Just between line ".end annotation" and "# instance fields" place your cursor and hit enter 2 times to make room (i.e leave 2 lines empty above "# instance fields" and 2 lines bellow ".end annotation") to paste THIS code (Blue one only)
9. Still in GlobalActions$SinglePressAction.smali look for the code "direct methods". Place your curser directly behind "direct methods" and hit enter to bring your curser down to the next line. Then paste THIS code (Blue one only):
10. Recompile (smali) your jar. You will get "classes.dex" and with 7zip, open the archive of the original Android Policy.jar. Then drag and drop the classes.dex you just compiled into the jar and push it to your phone.
Additional
If you want to change "Choose Reboot Method" text on top of that menu then:
- Open GlobalActions$99.smali.
- Go to following code and made your change (N.B: if you delete this entire code, you will disable head title of "Choose Reboot Method")
Ink effect enabling
This is handy one :crying:
To do this you will need to play with 2 files (android.policy.jar and SecSettings.apk) and lib folder.
Please download ink effect resources from here.
A. android.policy.jar file:
1. Copy the contents of to android.policy.jar folder.
2. Decompile android.policy.jar by backsmali/smali program.
3. Go to classout\com\android\internal\policy\impl\sec\ folder and paste the content of to android.policy.jar folder there and accept overwriting.
4. Now compile (smali), the result will be class.dex file. Open the original android.policy.jar by WinRAR and drag drop class.dex file inside android.policy.jar file
Now push the new modified android.policy.jar to system\framework in your phone
B. SecSettings.apk file:
Decompile SecSettings.apk by APK-Multi tool
I. Image resource
Copy all images in to res.drawable-xhdpi folder to res\drawable-xhdpi
II. Adding lines to strings.xml resources
1. Go to res\values and open strings.xml by notepad++
2. Go to the end of strings.xml file and just before </resources> line add new strings for ink color that are missing; here we will add 3 lines for the 3 missing colors, so we will just add the following lines:
3. Now save your file.
III. InkeffectPreview.smali
1. Copy the files InkeffectPreview.smali
2. Go to smali\com\android\settings and pate it there and accept changes.
Now this is the tricky part..!!
3. Open it and go to the following section:
4. You can see here several numbers... these are [ink_ nameofcolor] ids for array_14 and [ink_ nameofcolor _h] ids for array_0a in public.xml.
5. So you have to open public.xml file from res\values folder
6. Search for colors ids you added for start search for ink_none for array_14 section and ink_none_h for array_0a section.
We will start with ink_none
The line will be something like this:
And if you noticed the array_14 section in InkeffectPreview.smali the first line will represent the ink_none in public.xml file. So we have to convert public.xml ids to array_14, SO PLEASE match to colors here:
to in array_14 section:
Yes thats it!! Do the same for ink_none_h id in array_0a section.
to in array_0a section:
7. Now we have finished editing InkeffectPreview.smali for the two none color ids (ink_none & ink_none_h)
8. Do the same for the rest of colors (the orders of array_14 & array_0a will represent the order of ink colors in your settings menu later on, so it must be in exact order)
IV. LockScreenSettings.smali
1. Copy the files LockScreenSettings.smali
2. Go to smali\com\android\settings and pate it there and accept changes.
3. Open it and go to the following section:
4. You can see here several numbers... these are [ink_effect_color_nameofcolor] ids in public.xml
5. The first line will represent the ink_effect_color_none text in public.xml file. So we have to convert public.xml ids to array_10, SO PLEASE match to colors here:
to in array_10:
6. Now we finish editing LockScreenSettings.smali for the none color ids (ink_effect_color_none) this will represent the text color name in settings menu later on, so make color orders as same as order in InkeffectPreview.smali or you will have wrong color to wrong text color name in settings menu!!
7. Do the same for the rest of colors.
NOW we finally finish editing SecSettings.apk. Recompile the finished project and push it to your phone.
C. lib folder
Just copy the content of to lib folder to lib folder in system\lib in your phone.
Integrating application in settings menu
This really handy one.. so take care!!:confused:
In this tutorial, we will add USB-Mode program to Settings menu as an example
On your PC
1) Decompile SecSettings.apk.
2) Decompile the program that you want to add to settings menu (USB-Mode)
3) Go to \res\drawable-xhdpi folder and add icon for your program that you want to add (you can take it from decompiled wanted program (USBMode folder).
![]()
4) Go to \res\values folder and open strings.xml by NotePad++ and add these lines for your program
Here change gloryromaddons with any thing you want to show as a header in the Settings menu. usbswitcher_text is your wanted program
5) Go to \res\xml folder and open settings_headers.xml by NotePad++ and add these lines (the place you put these lines will be the place where added program will be displayed in Settings menu)
The first line reflect the header title in settings menu (So gloryromaddons will be seen as GloryROM Addons in the phone, see strings.xml that we edited and you will figure it out!!)
The 2nd line is for added program:
The 3rd line is the functionality and is the most difficult one:
![]()
install the program you want to add (USB mode switcher) and ADW launcher from Google play and make ADW launcher as your phone launcher. Find a blank area on your homescreen(s), long press, then select custom shortcut --> pick your activity --> activities --> browse down until you find USB switcher app and expand with the arrow on the left of USB switcher, you will see several actions (some may have only one). The first one in the list is usually its opening class; it is in between the ( )'s. In this example it is .USB_switcherActivity
![]()
Go back to your PC:
So now androidtargetClass= android:targetPackage.Action will be:
androidtargetClass= in.zatta.USB_switch.USB_switcherActivity
6) Now compile SecSettings and push it to your phone.
Additional step:
If you want to hide this app from applications drawer do the followings:
1) Decompile your desired app (here USB-Mode.apk)
2) Gto AndroidManifest.xml file and open it by NotePad++
3) Delete this line :
4) Compile your app as non system apk and sign it then push it to your phone
Call record enabling
1. Put the SecPhone.apk in baksmali folder.
2. Follow its procedure to baksmali SecPhone.apk, if done you will have classout folder.
3. Open classout folder and go to \com\android\phone\PhoneFeature.smali, open it by NotePad++ and search for line makeFeatureForUsa()V and put these lines (Blue color text only) before "return-void" line:
4. Save the file and recompile (smali) your SecPhone.apk. You will get a "classes.dex" file. With WinRAR, open the the original SecPhone.apk. Then drag and drop the classes.dex you just compiled into the SecPhone.apk. Push the SecPhone.apk to your phone.
Disabling ascending ringtone
1. Put the SecPhone.apk in baksmali folder.
2. Follow its procedure to baksmali SecPhone.apk, if done you will have classout folder.
3. Open classout folder and go to \com\android\phone\Ringer$1.smali. Search for setStreamVolume. There should be two results. Delete the first one (the whole line).
Now search for nop (usually at the bottom of the file!!), copy it and hit enter twice and paste again (see code bellow, the blue one). "leave one line space in between each line":
4. Save Ringer$1.smali
5. Recompile (smali) your SecPhone.apk. You will get a "classes.dex" file. With WinRAR, open the the original SecPhone.apk. Then drag and drop the classes.dex you just compiled into the SecPhone.apk. Push the SecPhone.apk to your phone.
Smart Rotation enabling
1- Decompile SecSettings.apk and go to smali/com/android/settings/DisplaySettings.smali
2- Open this smali file with a NotePad++ and look for these lines and delete them all:
3. Recompile and push to your phone.
4 Lockscreen shortcuts enabling
1- Decompile SecSettings.apk and go to smali/com/android/settings/lockscreenshortcut/LockScreenShortcutSettings.smali
2- Open this file with notpad++ and change the following line:
to:
3- Save file and recompile and push to your phone.
SMS hacks: 200 contact recipients and disable auto converting to MMS, displaying sent Time instead of the received time
Decompile SecMMS.apk file by APK-Multi tool
I. Increase Contacts adding for the message:
In /res/xml/mms_config.xml change the following values:
to:
II. Change the AutoConverting:
still in mms_config.xml file, change the following values:
to:
III. Display sent tme instead of the received time:
1. Go to /smali/com/android/mms/transaction/SMSReceiverService.smali, search for currentTimeMillis" and change the following values:
to:
2. Search again for next currentTimeMillis" and change the following values:
to:
3. Save changes and compile.
Unlimited Multiwindow apps
For this one, we need to play with 2 files (flashbarservice.apk and services.jar)
A. Flashbarservice.apk:
1. Decompile the flashbarservice.apk with APK-Multi tool.
2. Go to \smali\com\sec\android\app\FlashBar Service\FlashBarInfo.smali.
3. Open the file FlashBarInfo.smali using notepad++.
4. search for .method public generateFlashBarList()V and change the following code from:
to:
5. Save and recompile and push to your phone.
B. services.jar:
1. Decompile services.jar by Backsmali/smali program.
2. Go to classout\smali\com\android\server\am\Multi WindowManagerService.smali
3. Open the file using notepad++ and search for following .method public isSupportApp(Ljava/lang/String)Z. Change the code from:
to (the green to blue lines):
4. Save file and recompile (Smali), You will get a "classes.dex" file. With WinRAR, open the the original service.jar. Then drag and drop the classes.dex you just compiled into the service.jar. Then push it to your phone.
Battery theming
First download my battery icon packs from here and use it as a resource (of course you can create your own!!).
1. Decompile SystemUI.apk with APK-Multi tool.
2. In Battery icon pack folder choose your desired battery theme and copy all png icons ONLY.
3. Go to \res\drawable-xhdpi folder and paste your icons there.
4. Now go back to Battery icon pack folder and in your desired battery theme folder, copy the two xml files (stat_sys_battery.xml and stat_sys_battery_charge.xml).
5. Go to \res\drawable folder and paste them there and accept changes.
6. Recompile and push it to your phone.
These are all what I know from reading here and there :cool:
So if you find this thread useful, I just want you to pray for me and nothing else :angel:
and if you find another apk modding tutorials, please let me know (SHARING IS CARING DUDES!! :D)
and that is it.. and please stay safe..
Peace :)
From the concept SHARING IS CARING, I am going to share with you how to hack your GT-N7000 system apks, so everyone can use this thread as a reference for how to mod their apks.
You have to keep in mind that there are different modding hacks that until this time I couldn't figure out how it is done. So please let me know if you have any modding that I didn't mentioned :D..
So let's start..!!
Needed tools:
1) APK-Multi tool. You can use my repacked one (Nov 2012) from here.
2) Backsmali/Smali program from here
3) Notepad++ program from here
4) WinRAR or 7-zip archiver
5) Willing of learning and some patience and cold nerves!!
Quote:
|
1. Just add this file to /system/etc/permissions in your phone.
2. Fix permission to rw-r--r-- and reboot
CRT TV effect
Quote:
|
Remember to set compression level to 0 in APK-Multi tool before proceeding in these steps |
- Decompile framework-res.apk using APK-Multi tool.
- Edit the file \res\values\bools.xml
- Change value of
to falseCode:<bool name=config_animateScreenLights>true</bool>
- Compile framework-res.apk and push it to your phone.
Change default home screen wallpaper and default lock screen wallpaper
Quote:
|
Remember to set compression level to 0 in APK-Multi tool before proceeding in these steps |
2. Go to \res\drawable-xhdpi folder and change the following pics to what you want:
- default_wallpaper (Home screen wallpaper)
- keyguard_default_wallpaper (Lock screen wallpaper)
4. Compile framework-res.apk and push it to your phone.
Here are some pics taken from SGN2: download
4-way Reboot Menu
1. We will need Backsmali/Smali program for this.
2. Download the following resources files (GlobalActions$99$1.smali, GlobalActions$99$2.smali, GlobalActions$99.smali)
3. Put the android.policy.jar in baksmali folder.
4. Follow its procedure to baksmali android.policy.jar, if done you will have classout folder.
5. Open classout folder and go to \com\android\internal\policy\impl and paste the three resource files; (GlobalActions$99$1.smali, GlobalActions$99$2.smali and GlobalActions$99) there.
6. With notepad++ open the GlobalActions.smali. (Note: Don't confuse it with GlobalAction$Action.smali)
7. In GlobalActions.smali, change GlobalActions$5 to GlobalActions$99 on both lines, and save it.
>>The Code should look like this:<<
Code:
new-instance v0, Lcom/android/internal/policy/impl/GlobalActions$99;


const v1, 0x108064b


const v2, 0x1040169


invoke-direct {v0, p0, v1, v2}, Lcom/android/internal/policy/impl/GlobalActions$99;-><init>(Lcom/android/internal/policy/impl/GlobalActions;II)V


iput-object v0, p0, Lcom/android/internal/policy/impl/GlobalActions;->mRestart:Lcom/android/internal/policy/impl/GlobalActions$SinglePressAction;Code:
.end annotation


# static fields

.field protected static rebootMode:I


.field protected static final rebootOptions:[Ljava/lang/String;


# instance fieldsCode:
# direct methods

.method static constructor <clinit>()V

    .registers 3


    const/4 v0, 0x4


    new-array v0, v0, [Ljava/lang/String;


    const/4 v1, 0x0


    const-string v2, "Reboot"


    aput-object v2, v0, v1


    const/4 v1, 0x1


    const-string v2, "Hot Reboot"


    aput-object v2, v0, v1


    const/4 v1, 0x2


    const-string v2, "Download"


    aput-object v2, v0, v1


    const/4 v1, 0x3


    const-string v2, "Recovery"


    aput-object v2, v0, v1


    sput-object v0, Lcom/android/internal/policy/impl/GlobalActions$SinglePressAction;->rebootOptions:[Ljava/lang/String;


    return-void

.end method


.method protected constructor <init>(II)VAdditional
If you want to change "Choose Reboot Method" text on top of that menu then:
- Open GlobalActions$99.smali.
- Go to following code and made your change (N.B: if you delete this entire code, you will disable head title of "Choose Reboot Method")
Code:
const-string v2, "Choose Reboot Method"


    invoke-virtual {v1, v2}, Landroid/app/AlertDialog$Builder;->setTitle(Ljava/lang/CharSequence;)Landroid/app/AlertDialog$Builder;


    move-result-object v1
Ink effect enabling
This is handy one :crying:
To do this you will need to play with 2 files (android.policy.jar and SecSettings.apk) and lib folder.
Please download ink effect resources from here.
A. android.policy.jar file:
1. Copy the contents of to android.policy.jar folder.
2. Decompile android.policy.jar by backsmali/smali program.
3. Go to classout\com\android\internal\policy\impl\sec\ folder and paste the content of to android.policy.jar folder there and accept overwriting.
4. Now compile (smali), the result will be class.dex file. Open the original android.policy.jar by WinRAR and drag drop class.dex file inside android.policy.jar file
Now push the new modified android.policy.jar to system\framework in your phone
B. SecSettings.apk file:
Decompile SecSettings.apk by APK-Multi tool
I. Image resource
Copy all images in to res.drawable-xhdpi folder to res\drawable-xhdpi
II. Adding lines to strings.xml resources
1. Go to res\values and open strings.xml by notepad++
2. Go to the end of strings.xml file and just before </resources> line add new strings for ink color that are missing; here we will add 3 lines for the 3 missing colors, so we will just add the following lines:
Code:
    <string name="ink_effect_color_none">None</string>

    <string name="ink_effect_color_pink">Pink</string>

<string name="ink_effect_color_lightblue">Light Blue</string>Quote:
|
NOW you need to recompile your SecSettings.apk!! This is important to generate new id in public.xml files automatically!! NOW decompile the new SecSettings.apk (be alert not to decompile the old one, it will not include the new changes!!) You can delete the old SecSettings.apk from project folder to not cause confusion. |
1. Copy the files InkeffectPreview.smali
2. Go to smali\com\android\settings and pate it there and accept changes.
Now this is the tricky part..!!
3. Open it and go to the following section:
Code:
    :array_14

    .array-data 0x4

        0xb7t 0x3t 0x2t 0x7ft

        0xb9t 0x3t 0x2t 0x7ft

        0xcet 0x1t 0x2t 0x7ft

        0xcat 0x1t 0x2t 0x7ft

        0xc6t 0x1t 0x2t 0x7ft

        0xcct 0x1t 0x2t 0x7ft

        0xd0t 0x1t 0x2t 0x7ft

        0xc8t 0x1t 0x2t 0x7ft

        0xb5t 0x3t 0x2t 0x7ft

    .end array-data


    :array_2a

    .array-data 0x4

        0xb8t 0x3t 0x2t 0x7ft

        0xbat 0x3t 0x2t 0x7ft

        0xcft 0x1t 0x2t 0x7ft

        0xcbt 0x1t 0x2t 0x7ft

        0xc7t 0x1t 0x2t 0x7ft

        0xcdt 0x1t 0x2t 0x7ft

        0xd1t 0x1t 0x2t 0x7ft

        0xc9t 0x1t 0x2t 0x7ft

        0xb6t 0x3t 0x2t 0x7ft

.end array-data5. So you have to open public.xml file from res\values folder
6. Search for colors ids you added for start search for ink_none for array_14 section and ink_none_h for array_0a section.
We will start with ink_none
The line will be something like this:
Code:
<public type="drawable" name="ink_none" id="0x7f0203b7" />Code:
<public type="drawable" name="ink_none" id="0x7f0203b7" />Code:
0xb7t 0x3t 0x2t 0x7ftCode:
<public type="drawable" name="ink_none_h" id="0x7f0203b8" />Code:
0xb8t 0x3t 0x2t 0x7ft8. Do the same for the rest of colors (the orders of array_14 & array_0a will represent the order of ink colors in your settings menu later on, so it must be in exact order)
IV. LockScreenSettings.smali
1. Copy the files LockScreenSettings.smali
2. Go to smali\com\android\settings and pate it there and accept changes.
3. Open it and go to the following section:
Code:
    :array_10

    .array-data 0x4

        0x09t 0xft 0x9t 0x7ft

        0x0at 0xft 0x9t 0x7ft

        0x4ft 0xdt 0x9t 0x7ft

        0x50t 0xdt 0x9t 0x7ft

        0x52t 0xdt 0x9t 0x7ft

        0x53t 0xdt 0x9t 0x7ft

        0x54t 0xdt 0x9t 0x7ft

        0x51t 0xdt 0x9t 0x7ft

        0x0bt 0xft 0x9t 0x7ft

.end array-data5. The first line will represent the ink_effect_color_none text in public.xml file. So we have to convert public.xml ids to array_10, SO PLEASE match to colors here:
Code:
<public type="string" name="ink_effect_color_none" id="0x7f090f09" />Code:
0x09t 0xft 0x9t 0x7ft7. Do the same for the rest of colors.
NOW we finally finish editing SecSettings.apk. Recompile the finished project and push it to your phone.
C. lib folder
Just copy the content of to lib folder to lib folder in system\lib in your phone.
Quote:
|
Black and Red color got removed from CircleUnlockRippleRenderer files. Pink and Brown are added instead. If you want to add new colors, you have to modify renderer files. Arrays are there, with 3 dimension vector indicating RGB (Float,Float,Float). But since it's real hard to get float data since smali doesn't understand what the "float" is, so I suggest you using Eclipse to write float as java, compile app, decompile app to get float in smali. (thanks to jarari2 for providing this info) |
Integrating application in settings menu
This really handy one.. so take care!!:confused:
In this tutorial, we will add USB-Mode program to Settings menu as an example
On your PC
1) Decompile SecSettings.apk.
2) Decompile the program that you want to add to settings menu (USB-Mode)
3) Go to \res\drawable-xhdpi folder and add icon for your program that you want to add (you can take it from decompiled wanted program (USBMode folder).

4) Go to \res\values folder and open strings.xml by NotePad++ and add these lines for your program
Code:
    <string name="gloryromaddons">GloryROM Addons</string>

<string name="usbswitcher_text">USB mode switcher</string>5) Go to \res\xml folder and open settings_headers.xml by NotePad++ and add these lines (the place you put these lines will be the place where added program will be displayed in Settings menu)
Code:
<header android:title="@string/gloryromaddons" />

    <header android:icon="@drawable/usbswitcher" android:title="@string/usbswitcher_text">

        <intent android:targetPackage="in.zatta.USB_switch" android:action="android.intent.action.MAIN" android:targetClass="in.zatta.USB_switch.USB_switcherActivity" />

    </header>
The 2nd line is for added program:
- android:icon=@drawable/name of icon you put in drawable-xhdpi folder (here we put usbswitcher as the icon name inside drawable-xhdpi)
- android:title=@string/name of string put for added program in strings.xml (here we put usbswitcher_text as in strings.xml)
The 3rd line is the functionality and is the most difficult one:
- android:targetPackage=package of wanted program inside its own AndroidManifest.xml (here it is in.zatta.USB_switch)
- android:action=first action of wanted program inside its own AndroidManifest.xml (here it is android.intent.action.MAIN)

- androidtargetClass= android:targetPackage.Action (we have android:targetPackage from previous step but we need also .Action how to get it??) This is the tricky one so do the following:
install the program you want to add (USB mode switcher) and ADW launcher from Google play and make ADW launcher as your phone launcher. Find a blank area on your homescreen(s), long press, then select custom shortcut --> pick your activity --> activities --> browse down until you find USB switcher app and expand with the arrow on the left of USB switcher, you will see several actions (some may have only one). The first one in the list is usually its opening class; it is in between the ( )'s. In this example it is .USB_switcherActivity

Go back to your PC:
So now androidtargetClass= android:targetPackage.Action will be:
androidtargetClass= in.zatta.USB_switch.USB_switcherActivity
6) Now compile SecSettings and push it to your phone.
Additional step:
If you want to hide this app from applications drawer do the followings:
1) Decompile your desired app (here USB-Mode.apk)
2) Gto AndroidManifest.xml file and open it by NotePad++
3) Delete this line :
Code:
<category android:name="android.intent.category.LAUNCHER" />Call record enabling
1. Put the SecPhone.apk in baksmali folder.
2. Follow its procedure to baksmali SecPhone.apk, if done you will have classout folder.
3. Open classout folder and go to \com\android\phone\PhoneFeature.smali, open it by NotePad++ and search for line makeFeatureForUsa()V and put these lines (Blue color text only) before "return-void" line:
Code:
    invoke-static {}, Lcom/android/phone/PhoneFeature;->makeFeatureForUsa()V


    .line 899

    sget-object v0, Lcom/android/phone/PhoneFeature;->mFeatureList:Ljava/util/HashMap;


    const-string v2, "voice_call_recording"


    const/4 v4, 0x1


    invoke-static {v4}, Ljava/lang/Boolean;->valueOf(Z)Ljava/lang/Boolean;


    move-result-object v3


    invoke-virtual {v0, v2, v3}, Ljava/util/HashMap;->put(Ljava/lang/Object;Ljava/lang/Object;)Ljava/lang/Object;


return-voidDisabling ascending ringtone
1. Put the SecPhone.apk in baksmali folder.
2. Follow its procedure to baksmali SecPhone.apk, if done you will have classout folder.
3. Open classout folder and go to \com\android\phone\Ringer$1.smali. Search for setStreamVolume. There should be two results. Delete the first one (the whole line).
Code:
    .line 394

    iget-object v1, p0, Lcom/android/phone/Ringer$1;->this$0:Lcom/android/phone/Ringer;


    iget-object v1, v1, Lcom/android/phone/Ringer;->mAudioManager:Landroid/media/AudioManager;


invoke-virtual {v1, v3, v5, v4}, Landroid/media/AudioManager;->setStreamVolume(III)VCode:
    goto/16 :goto_b


    .line 717

    nop


    nop


    :pswitch_data_1ca

.packed-switch 0x15. Recompile (smali) your SecPhone.apk. You will get a "classes.dex" file. With WinRAR, open the the original SecPhone.apk. Then drag and drop the classes.dex you just compiled into the SecPhone.apk. Push the SecPhone.apk to your phone.
Smart Rotation enabling
1- Decompile SecSettings.apk and go to smali/com/android/settings/DisplaySettings.smali
2- Open this smali file with a NotePad++ and look for these lines and delete them all:
Code:
    invoke-virtual {p0}, Lcom/android/settings/DisplaySettings;->getPreferenceScreen()Landroid/preference/PreferenceScreen;


    move-result-object v12


    iget-object v13, p0, Lcom/android/settings/DisplaySettings;->mSmartRotation:Landroid/preference/CheckBoxPreference;


invoke-virtual {v12, v13}, Landroid/preference/PreferenceScreen;->removePreference(Landroid/preference/Preference;)Z4 Lockscreen shortcuts enabling
1- Decompile SecSettings.apk and go to smali/com/android/settings/lockscreenshortcut/LockScreenShortcutSettings.smali
2- Open this file with notpad++ and change the following line:
Code:
# direct methods

.method static constructor <clinit>()V

    .locals 2


    .prologue

    const/4 v1, 0x0


    .line 79

    const/4 v0, 0x4


sput v0, Lcom/android/settings/lockscreenshortcut/LockScreenShortcutSettings;->MAX_SHORTCUT_ICON:ICode:
# direct methods

.method static constructor <clinit>()V

    .locals 2


    .prologue

    const/4 v1, 0x0


    .line 79

    const/4 v0, 0x3


sput v0, Lcom/android/settings/lockscreenshortcut/LockScreenShortcutSettings;->MAX_SHORTCUT_ICON:ISMS hacks: 200 contact recipients and disable auto converting to MMS, displaying sent Time instead of the received time
Decompile SecMMS.apk file by APK-Multi tool
I. Increase Contacts adding for the message:
In /res/xml/mms_config.xml change the following values:
Code:
<int name="recipientLimit">10</int>Code:
<int name="recipientLimit">200</int>still in mms_config.xml file, change the following values:
Code:
<int name="recipientLimit">10</int>Code:
<int name="recipientLimit">200</int>1. Go to /smali/com/android/mms/transaction/SMSReceiverService.smali, search for currentTimeMillis" and change the following values:
Code:
invoke-static {}, Ljava/lang/System;->currentTimeMillis()JCode:
invoke-virtual {p1}, Landroid/telephony/SmsMessage;->getTimestampMillis()JCode:
invoke-static {}, Ljava/lang/System;->currentTimeMillis()JCode:
invoke-virtual {v0}, Landroid/telephony/gsm/CbMessage;->getTimestampMillis()JQuote:
|
If it doesn't work, clear the cache, the Dalvik cache, and also clear data for Messaging under Settings->Applications->Manage Applications (it won't delete your messages). |
Unlimited Multiwindow apps
For this one, we need to play with 2 files (flashbarservice.apk and services.jar)
A. Flashbarservice.apk:
1. Decompile the flashbarservice.apk with APK-Multi tool.
2. Go to \smali\com\sec\android\app\FlashBar Service\FlashBarInfo.smali.
3. Open the file FlashBarInfo.smali using notepad++.
4. search for .method public generateFlashBarList()V and change the following code from:
Code:
const-string v8, "android.intent.category.MULTIWINDOW_LAUNCHER"Code:
const-string v8, "android.intent.category.LAUNCHER"B. services.jar:
1. Decompile services.jar by Backsmali/smali program.
2. Go to classout\smali\com\android\server\am\Multi WindowManagerService.smali
3. Open the file using notepad++ and search for following .method public isSupportApp(Ljava/lang/String)Z. Change the code from:
Code:
.method public isSupportApp(Ljava/lang/String;)Z

    .locals 1


    iget-object v0, p0, Lcom/android/server/am/MultiWindowManagerService;->mSupportAppList:Ljava/util/ArrayList;


invoke-virtual {v0, p1}, Ljava/util/ArrayList;->contains(Ljava/lang/Object;)ZCode:
.method public isSupportApp(Ljava/lang/String;)Z

    .registers 2


    .prologue

    const/4 v0, 0x1


    return p0

.end methodBattery theming
First download my battery icon packs from here and use it as a resource (of course you can create your own!!).
1. Decompile SystemUI.apk with APK-Multi tool.
2. In Battery icon pack folder choose your desired battery theme and copy all png icons ONLY.
3. Go to \res\drawable-xhdpi folder and paste your icons there.
4. Now go back to Battery icon pack folder and in your desired battery theme folder, copy the two xml files (stat_sys_battery.xml and stat_sys_battery_charge.xml).
5. Go to \res\drawable folder and paste them there and accept changes.
Quote:
|
These xml files are encoded with a code that make battery discharging and charging animation; so if you got enough png icons, you can create your own lines in these xml files for better animation effects |
These are all what I know from reading here and there :cool:
So if you find this thread useful, I just want you to pray for me and nothing else :angel:
and if you find another apk modding tutorials, please let me know (SHARING IS CARING DUDES!! :D)
and that is it.. and please stay safe..
Peace :)